Wednesday, July 1, 2015

Laptop Bag DIY Project

I recently purchased a new 17" laptop not realizing how difficult it would be to find a bag to fit it. I was carrying it to work in a tote bag I made in my leather class at The Make Den but it was awkward and dangerous in the rain. I was looking for a new project to work on at the same time and came across a great laptop bag tutorial and decided to make one for myself and share the make with anyone else who needs a bag as much as me! I used the tutorial here as the base for my bag, but will go over as much as I can to help you out.


Supplies you will need:
  • 1yd self fabric (I used a light canvas)
  • 1yd lining (I used another light canvas)
  • 1yd leather/synthetic upholstery
  • fusible fleece
  • zipper (mine was a nylon 20" so I could sew over it)
  • 1"-1.5" webbing (enough for the kind of strap you want)
  • matching thread
  • walking foot is preferable for working with leather


I also bought a tri-glide and square rings because I had initially planned on doing a shoulder strap but found it would be too awkward with my large laptop on my hip and opted for handles instead. I tried to find fabric I liked on Queen St. but decided on ordering everything from Joann Fabric and Craft Store that had everything I needed.

Making your pattern


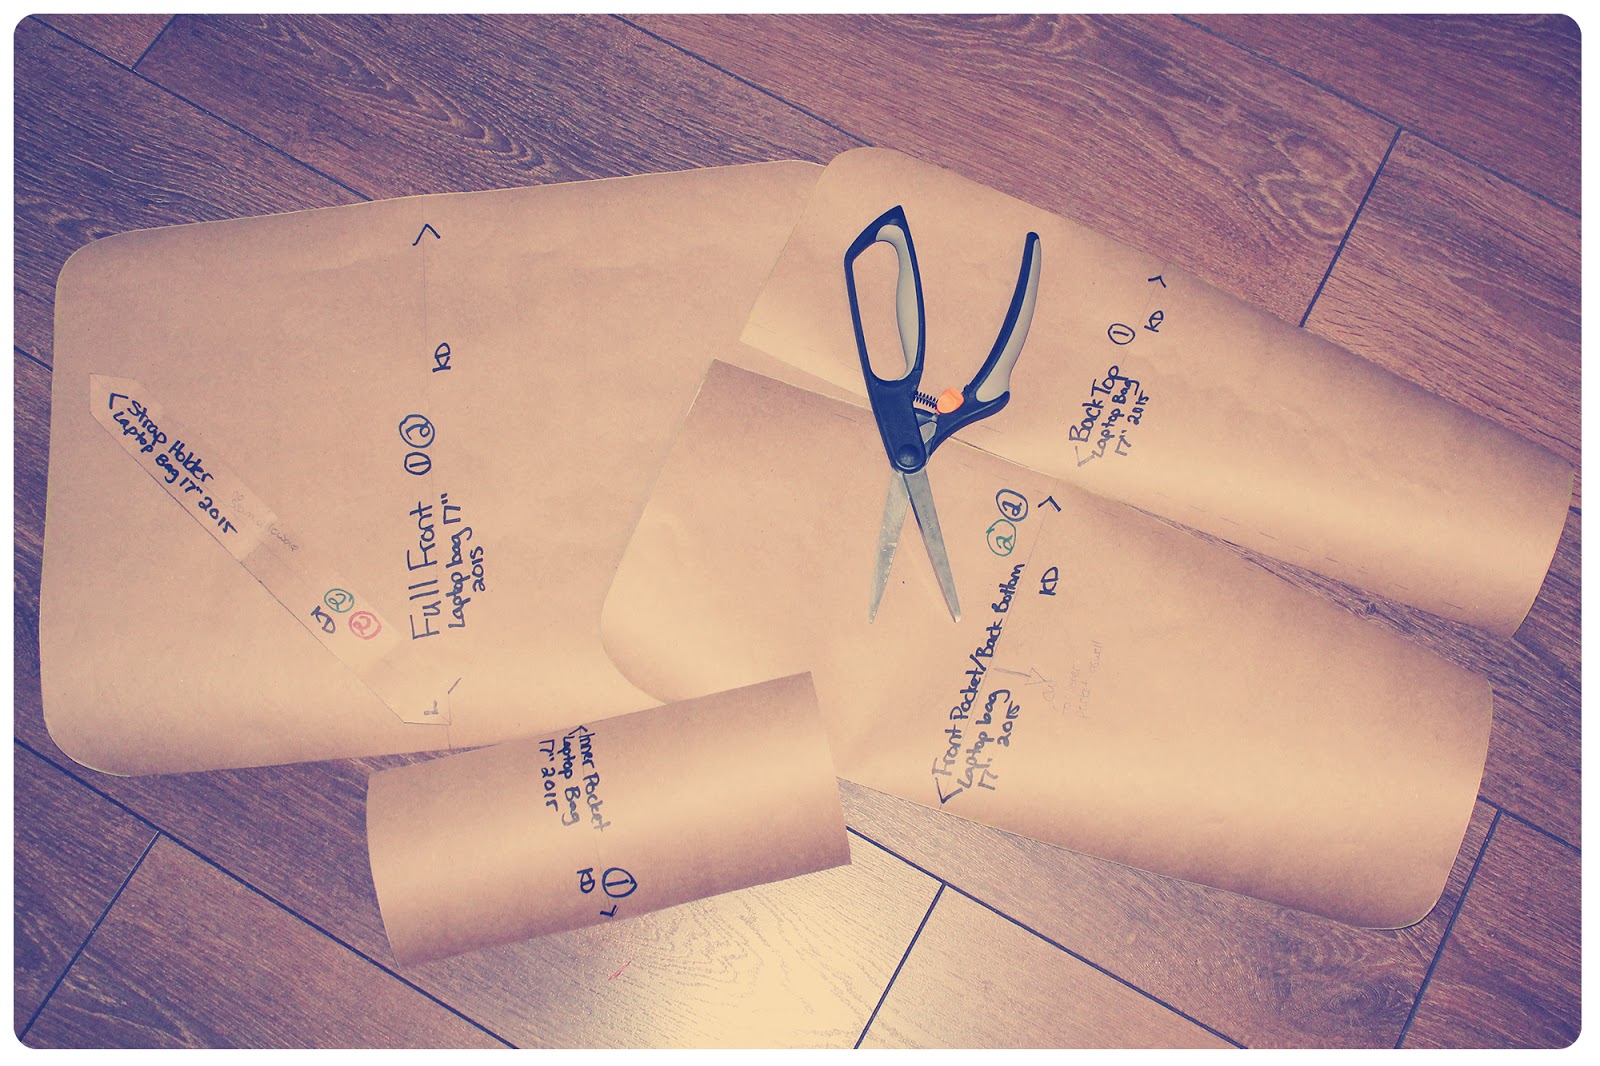
Same as the tutorial I followed, I measured the dimensions of my laptop and added 3" to the height and 3" to the width in order to create the basic shape of my bag (this included my seam allowance). I had decided that I wanted leather as the bottom piece and as pockets on the front of my bag. I added pockets inside as well. Below is a drawing of my pattern pieces with dimensions.


Making the bag


  1. Apply the fusible fleece to your fabric. I applied it to only the outer shell pieces so that it did not make it too tight for my sewing machine. Using the walking foot made it a lot easier to sew on top of the fusible fleece as well as on leather. **Reminder: when sewing on leather make sure to adjust your stitching length.
  2. Line the outer pocket. I understitched mine to that the lining did not poke out on top. Stay-stitch the pocket to your Front Piece. I top-stitched down the center line to make 2 pockets.
  3. Sew together the Back Top Piece to the Back Lower Piece.
  4. Sew Inner Pocket to one of your lining pieces.
  5. At this point you can apply handles to your pieces if you prefer, or do this after Step 8 if you are doing a shoulder strap.
  6. Apply zipper to the top of your outer pieces (I had to continue using my walking foot as my zipper foot would not allow me to sew with the fusible fleece. This was a HUGE pain.) Be very careful where you end your zipper so that your laptop can still squeeze through. I had to readjust mine multiple times.
  7. Apply lining piece to zipper.
  8. Sew your front pieces together on the side seams.
  9. Sandwich your bag inside the lining and sew the lining together leaving a good 4-5" opening at the bottom. Pull your bag right side out and edge-stitch the opening together to close it up.
Your bag is now complete!!


Thursday, June 6, 2013

Easy Homemade Breakfast Bars

Easy Homemade Breakfast Bars

Well I am trying to cut back on spending, especially when it comes to breakfasts. David leaves early every morning and normally ends up grabbing Tim Hortons or McDonalds downtown, so I thought it might make it easier if he could have something to eat on the go, something that doesn't need Tupperware to be taken with you. I didn't have any coconut or raisins or cranberries or seeds, but I found this recipe that uses whatever I had in the house. I think this recipe would be great if it used almond milk instead of skim milk, but use whatever you have.

Ingredients
 Dry:
  • 2 cups rolled oats
  • 1/2 cup whole wheat pastry flour (or regular flour)
  • 1/4 cup chopped walnuts (optional)
  • 1/4 cup dark chocolate chips (or dried fruit)
  • 1/4 cup sugar
  • 2 tsp. cinnamon
  • 1/2 tsp. salt
Wet:
  • 1 1/2 cup skim (or low fat) milk
  • 1 egg
  • 1 tsp. vanilla 
Step 1: Preheat oven to 375°F. In two separate bowls mix the dry ingredients and wet ingredients. Add the wet ingredient mix to the dry mix and stir until combined.

Step 2: Grease your pan (I used 2 8x8s, the original recipe used a 11x17 pan) with cooking spray. Pour in the mixture. You can sprinkle the top with dry oats if you like. Bake for 30 minutes.

Step 3: Allow for the pan to cool, then lift out the warm oatmeal square/rectangle out of the pan onto a cutting board. Cut with a pizza cutter into how many you like. The recipe called for 8 squares, but I prefer them in sticks and so it made 20 sticks. Wrap them in plastic wrap or in sandwich bags to store.

Yield: 8-20

Monday, June 3, 2013

Some Pretty Special Oatmeal Chocolate Chip Cookies

Oatmeal Chocolate Chip Cookies

I was craving some cookies yesterday, and what is better than oatmeal chocolate chip cookies that also have coconut in them!? I think this recipe would be great with gluten free flour. Click here to see the original recipe. The recipe yielded 30 cookies, but when I made it (I must have made the cookies smaller than called for) made 54! I also only had milk chocolate chips which gave the cookie that subtle chocolate taste. For the browning of the butter, check out the original recipe if you are confused as there are photos.

This recipe may seem long and tedious, but I found it rather simple to make, and the steps are fairly short (though it looks like a lot to do). They are definitely worth the effort!

Ingredients

  • 1 cup unsalted butter
  • 1 1/2 cup all-purpose flour
  • 1 teaspoon salt
  • 1 teaspoon baking soda
  • 1 teaspoon cinnamon
  • 1/2 teaspoon nutmeg
  • 1 cup brown sugar, packed
  • 1/2 cup white granulated sugar
  • 2 eggs (large), lightly beaten
  • 1 teaspoon vanilla extract
  • 2 Tbsp water
  • 1 1/2 cups semi-sweet chocolate chips
  • 1 cup chopped pecans (optional)
  • 1 cup sweetened, shredded coconut (optional)
  • 3 cups rolled oats or quick oats
Step 1: Preheat oven to 350°F. In a stainless-steel saucepan (very important!) brown the butter.

"Heat on medium. Melt the butter, whisking so that the butter melts evenly. Continue to cook the butter. As it cooks, the butter will foam up, and then the foam will subside. Whisk frequently to check underneath the bubbly surface. At some point, browned bits will form at the bottom of the pan and the butter will begin to smell nutty. Watch carefully, it's easy for the butter to go from browned to burnt. When the browned bits begin to form, remove the pan from the heat. Pour the melted butter, with the browned bits, into a glass or metal bowl. Allow to cool a bit while you prepare the other ingredients." (Instructions from the original recipe)

Step 2: Whisk together the flour, salt, baking soda, cinnamon and nutmeg in a separate bowl.

Step 3: Put cooled browned butter and browned bits in a mixer bowl with the brown and white sugar. Mix on high for 3 minutes (should be smooth). Add (lightly beaten) eggs and vanilla to the bowl and beat on medium for another 3 minutes.

Step 4: Mix with a rubber spatula or wooden spoon the flour mixture into the butter and sugar mix then add the 2 tbsp of water.

Step 5: Mix in the chocolate chips and the pecans and coconut (if desired) before adding the oatmeal. Stir until all is combined.

Step 6: Grease your cookie sheets or line it with parchment paper, then add tablespoon balls of cookie dough to the cookie sheet. Make sure to leave enough space between dough balls so that the cookies can spread out when baking. Bake for 10 minutes at 350°F or longer if you want them crispier. After baking, allow the cookies to cool for a couple of minutes before removing them to a cooling rack.

Yield: Calls for 30 (mine made 54)

Saturday, May 4, 2013

Vegan Chocolate Loaf Cake

Today I was in the midst of cleaning my house as it is being shown tomorrow for new renters, and decided the best thing to do to procrastinate was to bake something chocolate. Make sense, right? I didn't have any eggs or milk and wasn't in the mood for butter, so I decided to make a Vegan Chocolate Loaf Cake that I found through Yummly. The cake is moist with a thin crust and is a great way to satisfy that sweet tooth!


Ingredients:

1 1/2 cups all purpose flour
1 cup white sugar (would be great to replace with a less refined option)
1/4 cup cocoa
1 tsp baking soda
1/2 tsp salt
1/3 cup vegetable oil (I used olive oil for the omega 3)
1 tsp vanilla extract
1 tsp white vinegar
1 cup water

Step 1: Preheat oven to 350 degrees and lightly grease your 9x5 loaf pan. You could definitely adapt this recipe to a flatter square cake or cupcakes! Just watch the baking time.

Step 2: Sift together the flour, sugar, cocoa, baking soda and salt and combine.

Step 3: Add in the oil, vanilla, vinegar and water and mix until smooth. Pour the mixture into the loaf pan.

Step 4: Place in the center of the oven and bake for about 45 minutes (this was perfect time for my gas oven).

Thursday, December 6, 2012

Low Calorie Chocolate Cookies

The other night I was looking for a recipe for chocolate cookies that were somewhat healthy - who could ask for more? Anyway, these cookies use only egg whites and I have substituted the corn syrup in it for honey. Give them a try!

Ingredients:
1 1/2 cups flour
1/2 cup sugar
1/2 cup unsweetened cocoa
1/2 teaspoon baking soda
1/2 teaspoon salt
1/2 cup honey
3 egg whites

Step 1: Preheat oven to 350 degrees F and spray your cookie sheets with cooking spray.

Step 2: In a bowl combine flour, sugar, cocoa, baking soda and salt.

Step 3: Mix in the honey and egg whites until well blended-will be sticky and thick

Step 4: Drop the mixture onto the cookie sheets by the teaspoon (mine had to be modest teaspoons in order to make the 40 cookies the recipe suggested it should make, though perhaps my mixture was not perfect).

Step 5: Bake in the oven for 7-9 minutes or until just set - the cookies should be soft when pressed. Do not overbake.

Should make about 40 cookies. When made with the Karo syrup (corn syrup) it is estimated to be about 36 calories a cookie, I'm not sure what it is with honey instead, but I prefer the taste of the honey to corn syrup.

Some suggestions for using up those egg yolks are to make: key lime pie, pudding, creme brulee, sponge cake or custard. Don't want to waste anything, right?